Friday, November 11, 2011

Pumkin Pie with Gingersnap Crust

I have made a few pumpkin pie's in my time, but when I heard about a gingersnap crust I was excited to give it a try! I love more spice that sweetness in a pumpkin pie, so this sounded like the perfect recipe. Luckily, I was asked by a potential employer to bake a few different small desserts to see if my baking was up to par (more on that later).

Gingersnap Crust:
1 3/4 cup gingersnap cookie crumbs (crush in a plastic bag, using a rolling pin)
2 1/2 tbs butter (melted)
2 tbs sugar
- Combine all ingredients in a 9 inch pie pan, press onto the base and sides. Then bake for 5 minutes at 325 degrees.

Pumpkin Filling:
1 1/2 cup canned pumpkin
3/4 cup brown sugar
1 tbs cornstarch
1 tsp ground cinnamon
1/4 tsp ground nutmeg
1/4 tsp salt
1 tsp vanilla extract
2 eggs
1 can (12 fluid ounces) evaporated milk
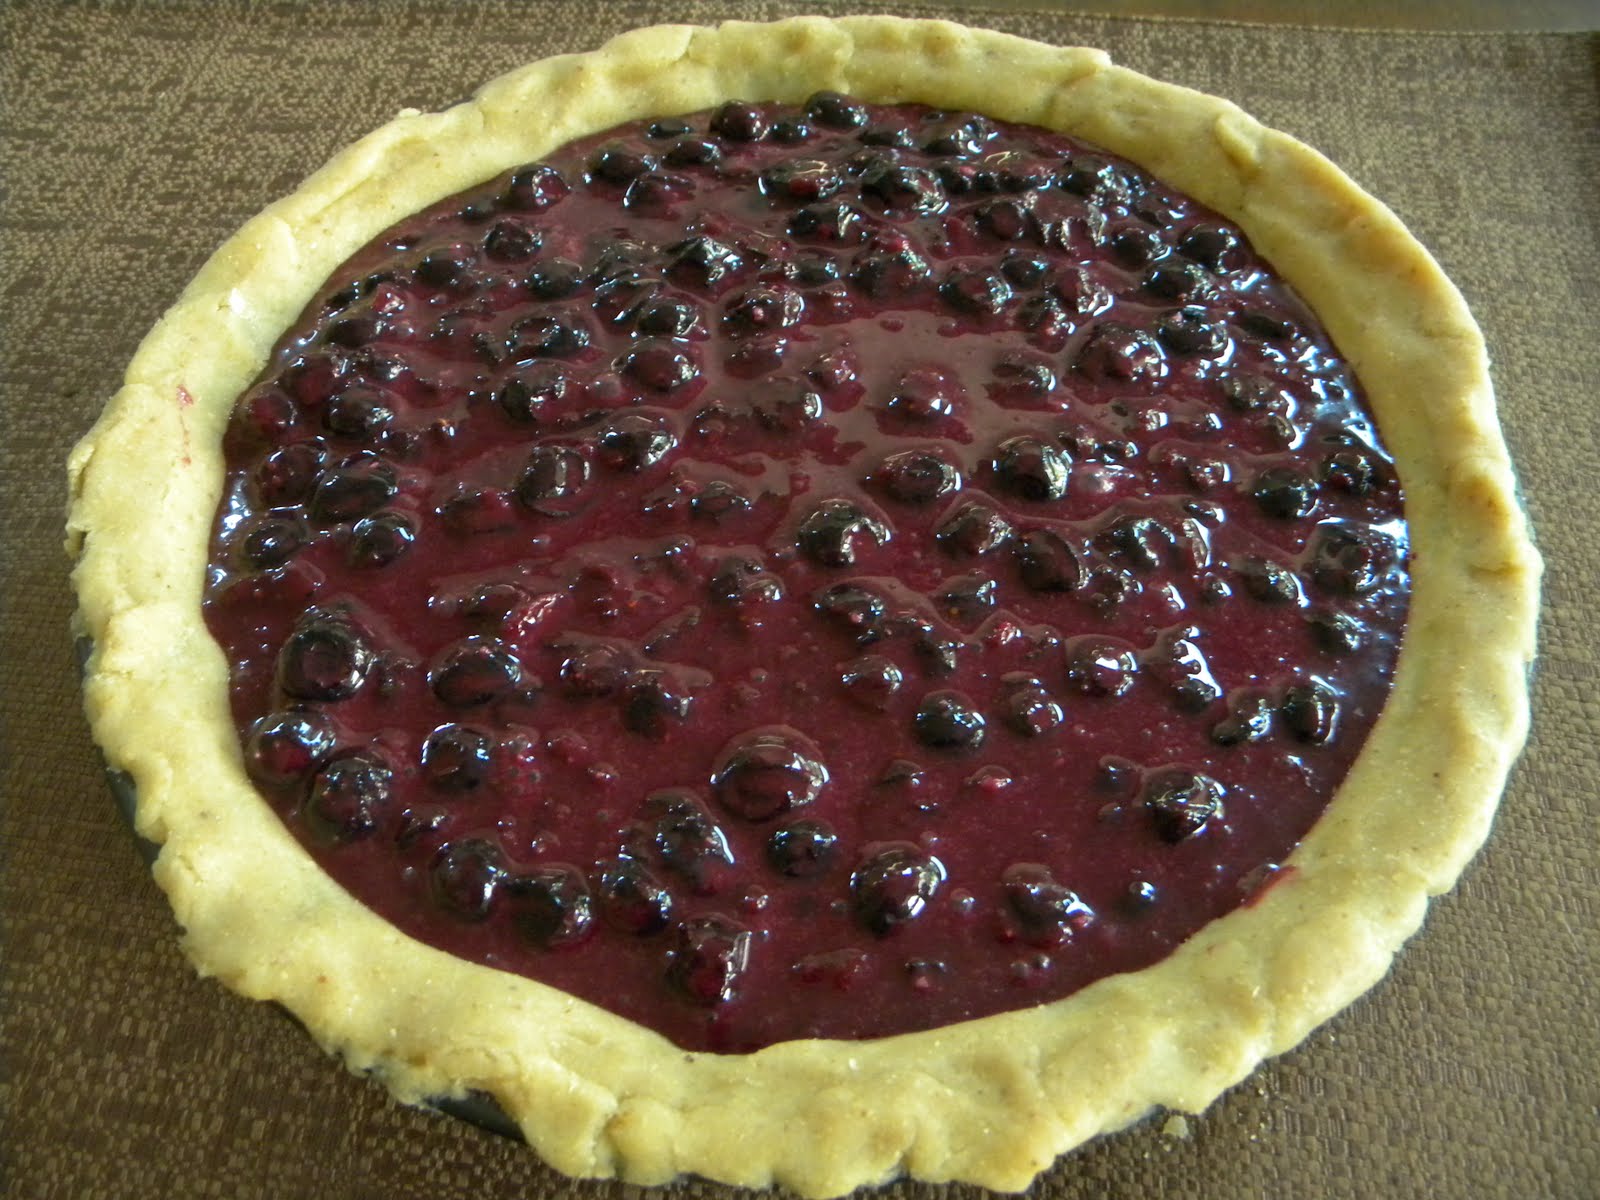
- Combine all ingredients in a bowl with a whisk until smooth. Pour into the gingersnap crust. Bake at 325 degrees for about 1 hour. (until a knife comes out clean). I also garnished my pie with the gingersnap cookies (mostly to cover the knife marks :). I cut them in half and placed them in the center of the pie.

Notes: I would recommend adding more spice if you enjoy that flavor (for me personally it was a little too bland). I am glad I was able to test it out before Thanksgiving; for the holiday I will plan on trying some grated ginger in the filling to add a stronger spice. 

Sunday, November 6, 2011

Mini Chocolate Cupcakes with Coffee Frosting

To be completely honest, neither of us are cupcake fans. Lets put it this way, if there was a table of assorted sweets, cupcakes would be the last to be chosen. They are usually too sweet, but these are just the right amount of sweetness and they are very moist!
Makes about 50 mini cupcakes or 12 large cupcakes.
Chocolate Cupcake Recipe:
1/2 cup cocoa powder
1 cup boiling water
3/4 cup brown sugar
1/2 cup buttermilk
2 tsp vanilla extract
4 oz butter
1 cup sugar
1 1/4 cup all purpose flour
3/4 tsp baking soda
1/2 tsp salt
2 eggs

Coffee Frosting:
1/2 stick butter (softened)
1/2 cup (4 oz) cream cheese (room temp)
1/4 cup yogurt (I used greek)
1 cup powdered sugar
1 tsp-1 tbls instant coffee (mix with a small amount of boiling water before adding to the frosting.
Cream all of the ingredients together with a hand mixture.

Preheat the oven to 350 degrees.
Mix together cocoa powder and boiling water. Add brown sugar, buttermilk, and vanilla.
In another bowl mix together the flour, baking soda, salt, and half of the sugar.
Use a mixer with the paddle attachement to beat the butter until fluffy. Add the remaining sugar and beat for one minute. Then add the eggs one at a time.
Alternate adding the cocoa mixture and the dry mixture until thoroughly mixed.
Use a small ice cream scoop to fill the cupcake molds about 3/4 full. Bake for 15-25 minutes or until a toothpick comes out clean.
Frost the cupcakes and add sprinkles! Enjoy.


Mini Carrot Cupcakes with Cream Cheese Frosting

This weekend I decided to bake mini cupcakes for a housewarming party, and they were a success! I made about 100; half were carrot and half were chocolate (I will post the recipe following this one). I love the frosting recipe because its not too sweet and there is yogurt to replace some of the cream cheese, so its a little healthier!
                                                      All of the cupcakes boxed up

Mini Carrot Cake Cupcake Recipe:
6 ounces flour
1 tsp baking soda
1/2 tsp salt
1 tsp ground cinnamon
1/2 tsp ground nutmeg
1/2 tsp ground cloves (I used pumpkin spice instead: about 1 tsp to give added spice)
8 1/2 oz sugar
5 oz vegetable oil
4 eggs
10 oz grated carrots (if making mini it is a good idea to cut up the carrots smaller)
3 oz chopped pecans

Cream Cheese Frosting:
1/2 stick butter (softened)
1/2 cup (4 oz) cream cheese (room temp)
1/4 cup unsweetened yogurt (I used greek yogurt)
1 cup powdered sugar (alter based on sweetness preference)
-Cream together the ingredients with a hand mixer.

Preheat the oven to 350 degrees.
Combine flour, baking soda, salt, spices, and half of the sugar in a bowl.
Mix the remainder of the sugar, oil, eggs, carrots, and pecans for two minutes on low speed in a mixer with a paddle attachment.
Then fold in the dry ingredients.
Use a small ice cream scoop to fill your cupcake molds about 3/4 of the way.
Bake for 15-25 minutes or until a toothpick comes out clean.
Then pipe or spread the frosting onto your cupcakes and top with your favorite sprinkles!

Makes about 50 mini cupcakes or 12 large cupcakes.

Friday, October 14, 2011

Pumpkin Spice Latte

It's that time of year again! When the leaves turn vibrant colors and the wind sends a pleasant chill through the spine. Well, not here in Southern California. But I like to pretend that is what is going on outside my house. I was excited to discover this latte recipe online. I love the flavors of pumpkin spice but they are always much to sweet and not spicy enough when buying them at a coffee shop! After making mine own I have no desire to spend money on a lousy, syrupy coffee shop version!
So here is a wonderful homemade vegan version: Makes 2 medium sized lattes

Base:
2 cups coconut milk (or any type of milk on hand)
1 cup brewed coffee or 2 shots of espresso
3 tbs unsweetened, canned pumpkin
1 tsp pumpkin pie spice (or cinnamon/nutmeg)
1 tsp vanilla extract
Agave to taste (Or any sweetener you prefer) 

Foam:
1/3 cup coconut milk (again can use any milk)
1 tsp agave (or honey/sugar)
Dash of spice

- Heat all of the base ingredients in a small sauce pan on low-medium heat (if using espresso wait and add at the very end). Stir with a whisk to combine and allow to come to a very low boil. I recommend tasting the mixture so that you can adjust the flavor to your liking. Pour into your mugs and set aside.
- In a glass cup mix all of your foam ingredients together and heat in the microwave, then use a foaming wand to foam the mixture. (If you don't have one, its okay. Just add the mixture to the base). Lastly pour the foam on top a garnish with a dash of spice.
And voila! A homemade (vegan) Pumpkin Spice Latte to enjoy throughout the holidays!

Our Autumn Table Centerpiece.
(Old baking book, elephant candle, pitcher from Germany, and squash from the farm stand)

Wednesday, September 21, 2011

Banana-Date Nut Bread

I decided to make this bread when my mom (the Queen of Banana Bread) was in Chicago, why I did this I have no clue. The flavor of the bread turned out great, but I used to much liquid so it was a little gooey inside. Next time I will try this out with my mom to get a better result!
Until then, this is the recipe I used. I altered it so that there is less liquid and the bread will have a much better texture!

3 ripe mashed bananas
6 chopped medjool dates
1/4 c applesauce
1 egg
¼ c agave (or sugar)
½ c coarsely chopped walnuts
1 1/4 c flour
¼ c almond meal
1 tsp baking soda
½ tsp salt
2 tsp cinnamon
¼ tsp nutmeg

Preheat the oven to 350 degrees.
In a large bowl mix together the bananas, applesauce, egg, agave, dates, and walnuts.
In a small bowl mix all of the dry ingredients together.
Then mix the dry ingredients into the wet mixture.
Pour the batter into a greased (cooking spray) 9x5 loaf pan.
Bake for 30-45 minutes, until a toothpick comes out clean.
Optional: Sprinkle coarse sugar on top before baking and more about 10 minutes before its done.

Monday, September 19, 2011

Vegan Breakfast Smoothie

Smoothies are such a fun and easy way to make a delicious breakfast! And since you can taste them as you add ingredients they are pretty hard to screw up. This morning I decided to try a new smoothie concoction with some healthier ingredients to kick-start my day!

I never measure with smoothies, so this recipe is just an approximate:
1/2 c coconut water
1 banana
1/2 an avocado
1 tbs quick cooking oats
1 tbs hemp powder
1/4 c frozen peas
1 handful of frozen blueberries

I was surprised at how good this tasted since there were avocado and peas in it. Now of course you can use any liquid you would like as well as fruit or veggies!

Saturday, September 17, 2011

For the Love of Saturdays

Saturday's represent joy, freedom, and relaxation. Children and adult's alike enjoy Saturday's because of the break from school, work, and the stresses that come along with them. I also appreciate this element of Saturday's, but its my favorite day for many more reasons than those. 
I specifically enjoy Saturday mornings because of the Farmers Market, Lattes, and NPR's morning lineup.

When I hear the words Farmer's Market I think of relaxation, health, freshness, and joy. And it gives us the opportunity to plan recipes for the week, which adds some excitement.
I wish we had a daily open air market that I could go to multiple times a week!
                                          Camarillo Farmer's Market

And right down the street from the Farmer's market is Element Coffee they make the best soy latte in town and on this foggy, cool Saturday morning it was the perfect beverage.
Element Latte
Since the Farmer's market does not supply all of the groceries we use, I headed over to my favorite grocery store; Trader Joe's. I love it's small local feel and how the employees are always so friendly and helpful. Going to Trader Joe's makes for an enjoyable shopping experience!

Another reason for my love of Saturday's is NPR's (National Public Radio) morning programs!
I love listening to Car Talk and Wait, Wait... Don't Tell Me!
They are both highly entertaining and fun to tune into!

On this particular Saturday I decided to bake Banana-Date Nut Bread. 
The Fall-like weather made it the perfect day for baking, it was even cool enough to wear a sweater!
And the lovely smell of banana bread in the oven is the perfect compliment to a blustery day!
I will post the recipe soon!

When I went to the car wash they had this banner displayed. And I think I did have a lucky day; maybe not winning the lottery lucky, but the kind of lucky that makes you thankful for the simple things in life.

And now I ask you to think about your favorite day of the week and why that day makes you smile. 
It doesn't have to be exciting or "cool"; as mine obviously isn't exciting for everyone, but its simple which is why I love it :)

On a side note, I just received this old cook book and it has dozens of Pie recipes inside. 
I am so excited to test them out! I only wish someone would buy them from me!

Thursday, September 15, 2011

Sometime's a dish sounds good.....

But that doesn't mean it will taste good. I found a recipe for Minty Zucchini & Strawberry Chilled Soup, which sounds interesting, refreshing, and extremely easy to make... though the latter only turned out to be true.
I think the raw garlic and raw zucchini were the two ingredients that caused the soup to taste, well let's say interesting.
It wasn't an appalling flavor, but the kind of dish that causes you to purse your lips and hesitate upon swallowing.
Making a disastrous dish always makes us appreciate the successful dishes even more!

Wednesday, September 14, 2011

Strawberry Rhubarb Pie

Today I was looking through the pie recipes I have posted and could not believe that I never got around to posting the recipe for my favorite and what I think to be my most successful pie! And this pie is Strawberry Rhubarb; I love how this pie has the sweet strawberries and the tart rhubarb, making it the perfect pie!
 I recommend using the Vodka Pie dough (My Favorite Pie Dough) for this pie.

Ingredients:
  • 2 1/2 cups chopped red rhubarb, fresh
  • 2 1/2 cups de-stemmed, washed and cut strawberries (halved)
  • 1 1/4 cups sugar
  • 2 tablespoons minute tapioca
  • 1 tablespoon all-purpose flour
  • 1/2 teaspoon lemon zest
  • 1/2 teaspoon lemon juice
  • 1/2 teaspoon ground cinnamon
  • 1 teaspoon vanilla extract
Directions:
Mix all ingredients together in a bowl
Pour into 9 inch pie crust
Cover with crust and crimp the edges (I recommend a lattice crust for this pie, it allows the vibrant red to be seen and all the juices tend to stay in the pie and not all over your oven!)
With pies I usually place them on a cookie sheet lined with parchment in case of bubbly juices.
Bake in a 425 degree oven for 15 minutes, then lower the heat to 325 for 45-50 minutes. 

Optional: Brush the top crust with egg white or cream and sprinkle with course sugar.

If you have never had a strawberry rhubarb pie, please try it! You will be glad you did. With this pie I received the most complements; "It is  good enough to be served in a restaurant" & "The best pie I've ever had"

Monday, September 12, 2011

Vegetable Paella

Paella is a Spanish rice dish that will often include seafood and sometimes meat. This is a vegetarian Paella dish that will serve about 6 people. We have been wanted to try making this dish for a while and we didn't realize how much work it was going to be! This is a recipe to make only if you are willing to slave over a hot stove for over an hour. Its tasty, but it is debatable whether its worth all of the work.
And we give you.....
Vegetable Paella

Ingredients:
1/2 liter (a little over 2 cups) Vegetable Stock- ours was a little dry, so maybe use more stock.
1 dried shiitake or porcini mushrooms (we opted out)
5 cloves garlic, 2 crushed and 3 finely chopped
Large pinch saffron
1/4 teaspoon sweet pimenton (did not use this either)
Coarse salt
Freshly ground black pepper
1 aubergine (eggplant) cut into 8mm-thick slices, ends discarded
62 ml (2 oz) olive oil
1 onion, finely diced
1 large tomato
1 red peppers, seeds and stem removed, cut into 2.5cm pieces
200g (7 oz) Bomba rice (you can also use white risotto, we ended up using basmati)
4 small artichokes, trimmed and steamed for 20 minutes, cut in half and chokes discarded
75g (2.5 oz) frozen peas (we used more, since this seemed to be a small amount)
2 lemons, 2 cut into wedges

I recommend starting by steaming the artichokes:
Fill a pot with 1/2 inch of water and allow to come to a boil. Add the artichokes with the ends cut off by standing them up in the water, cover and set to medium-low heat for 20 minutes.

Now for the Recipe:
You will need a....
small sauce pan
large saute pan
40-45cm paella pan or a large shallow saute pan

Combine the stock with the mushrooms and the 2  cloves of crushed garlic
in a large saucepan and boil over high heat for 10 minutes.

Lower the heat, add the saffron and pimenton and simmer for an additional 10 minutes to
thoroughly combine the flavours.

The secret to this recipe is a well-seasoned broth, so season to taste with salt and pepper and more saffron and/or pimenton if necessary.Keep warm over a low heat.

Meanwhile, prepare the aubergine. Sprinkle both sides of the aubergine slices with a bit of salt and lay them between sheets of kitchen paper for at least 15 minutes.

Cut the aubergine into 2.5cm pieces.
Heat half the olive oil in a large sauté pan set over medium heat and cook 1 cloves of the chopped garlic until fragrant, about a minute.

Add the pieces of aubergine to the pan and cook for 12–15 minutes, stirring now and then, until browned and softened. Set aside.

Meanwhile, heat the remaining olive oil in a 40–45cm paella pan over high heat until just beginning to smoke.
At this point, your stove will be a bit crowded:

Turn the heat down to medium, add the onion and the 2 remaining cloves of chopped garlic, and cook, stirring, until just beginning to soften, about 5 minutes.

Coarsely grate (not sure what that means? Neither did we so chop it!) the tomato, discarding the skin. Stir together and cook for another 2 minutes.

Add the peppers and continue to cook the vegetables together until softened, another 10 minutes.

Stir in the cooked aubergine. At this point the vegetable mixture can be set aside for up to 2 hours or refrigerated overnight.

When you're ready to roll, place the paella pan with the vegetables over high heat and pour the rice into the pan in an even cross ( not necessary but many Spaniards do this). 

Add the stock and stir to combine everything. Bring to the boil and then lower the heat to a simmer.

Arrange the artichokes and peas on top and simmer until the rice is cooked through, about 35 minutes.

Remove the pan from the heat source, cover with a large piece of foil and let it sit undisturbed for 15 minutes.

Alternatively you can cook the paella outside over a not-too-hot barbecue.

Squeeze the juice of the lemon over the paella and serve with lemon wedges. 
If you attempt this Vegetable Paella, let us know whether you found it worth the labor!

Thursday, September 8, 2011

Homemade Bread

 Never before has homemade bread been baked in this household. But, hey there's a first time for everything right? I snagged this recipe from my friends blog Roots, Wings, and Other Things which she also snagged from a different source. She made it sound so delicious and easy that I thought I would give it a try. As I write this my loaf is still baking and let me tell you, the smell is absolutely wonderful!
I did tweak a few of the ingredients to add my own flair to the bread.

Ingredients:
1 c warm water
1 tbs milk
2 tbs olive oil
2 tbs agave nectar (the original recipe called for honey)
2 tbs brown sugar
1 tsp salt
1 tsp dried thyme (this was something I added; there are many spices to add that would taste great)
2 c all-purpose flour
1 c quinoa flour (the original recipe used only all-purpose flour)
2 tsp instant active dry yeast

-Combine the first seven ingredients in a bowl and mix well. Then add the flours and yeast; knead the dough on a floured surface for about 15 min until it has an elastic consistency.
- Spray a bowl with nonstick spray and place the dough inside, cover with a towel, and let sit for about 40 min to allow the dough to rise (about double the size).
- Punch down the dough and knead until smooth (this does not take long). Spray a loaf pan with nonstick cooking spray, then form the dough into a loaf shape and lay it in the pan.
- Cover with a cloth and let sit another 40 min. to again rise.
- Bake at 350 degrees for 30-35 minutes; if the top is browning to fast cover it with a piece of foil.
- Once out of the oven, let the bread rest for about 5 minutes. Then remove it to a wire cooling rack and cover with a cloth. Can be served hot or cold.

Note: You can taste the quinoa flour in the bread, so if you don't like the taste or are unfamiliar with it I don't recommend using it. In the future I will experiment with other flours to achieve the best taste/health ratio :)

Saturday, September 3, 2011

Pink "Beet" Pancakes

Do not be terribly alarmed by the mention of beets and pancakes in the same title. Most people seem to dislike this brightly colored veggie; but beets are a great source of folate and potassium. This recipe allows you to add nutritional value to your weekend breakfast and you can choose whether or not to share the secret of what ingredient makes these pancakes pink!

Ingredients:
1/2 c flour
1 tbs sugar
pinch kosher salt
zest of 1 orange
1 1/4 c ricotta cheese
4 eggs separated
1/4 c beet puree (see end of post for recipe)
1 tsp cinnamon (optional)
1/4 tsp nutmeg (optional)
2 tsp vanilla or almond extract (almond adds more flavor to mask the beet)

Mix together the flour, sugar, salt, orange zest, ricotta, egg yolk, and beet puree in a bowl.

Beat the egg whites until stiff and all of the bubbles are small. Then, fold the egg whites into the beet mixture until combined and add any flavors (extracts and spices).
Your mixture should be very pink.
Now is the time to cook the pancakes!
Use cooking spray on a griddle and heat to medium-high. Spoon about 1/4 c of batter onto the griddle for each pancake and spread the batter in a circular motion because these will puff up. Now is the time to add any extras (chocolate chips, shredded coconut, fruit, etc.). Cook the pancakes for about 3 minutes on each side and serve alongside your favorite sweetener!

Beet Puree:
Use 3-4 beets
- Leave the beets whole and unpeeled, but trim the stems to 1 inch.
- Wrap the beets in aluminum foil and roast at 400 degrees for about 1 hour (until they can be pierced with a knife).
- Allow the beets to cool slightly and peel them
- After peeling cut into chunks and place in a food processor or blender for about 2 minutes.
To make life easier freeze the puree in separate bags of 1/4 cup. When you are ready to use the puree remove from the freezer and place in a bowl of hot water to thaw.

*You can make purees out of any vegetable and add it to any dish to either add flavor or mask a nutritional ingredient!

Saturday, August 27, 2011

Light, Lovely, Lunch.

Ever since our trip to Europe last summer (France & Germany) we have recreated variations on the beautiful and fresh breakfast's we enjoyed each morning. They are simple, fresh, and light; perfect for a summer afternoon.
This is an example of one such meal enjoyed recently:
To recreate this meal you will need:
A baguette- It has been so disappointing to eat baguettes here in southern California after eating the most delicious baguette ever in Paris. So if you know of a good baguette buy your favorite! We usually get ours from Trader Joe's; Panera Bread also makes decent ones.
Cheese- Buy your favorite soft cheese, we typically buy Brie and try to get the brands from France.
Fruit- As you can see we opted for fresh strawberries (I enjoy sliced pears, they compliment the brie well).
Jam- We bought a fig & walnut jam that is not too sweet.
Stuffed Dates- Dates are an amazing fruit, though they often get passed by! Recently at the farmers market we tasted these dates and were surprised at how delicious they were, so give them a try!
- Ours are stuffed with goat cheese; just pop out the pit and spoon in some goat cheese, they do not have to look perfect! The sweetness of the date and the creamy goat cheese compliment on another perfectly.

Sunday, July 31, 2011

Apple Pie with a Twist

I have never been a fan of apple pie, I always referred to the flavor as boring and not very exciting. I suppose the phrase, "As American as apple pie" exists for that reason; its wholesome and cookie cutter. So, when I saw the idea to add cayenne pepper to apple pie I decided to give it a try, hoping it would improve my lackluster opinion on the flavor......and I have to admit, it did.

Ingredients:
10 cups of peeled, thinly sliced apples (I used 8 Granny Smiths)
1 cup sugar
1/2 cup flour
1 tsp cinnamon
1/2 tsp nutmeg
1/2 tsp paprika
1/4 tsp cayenne

Preheat the oven to 425 degrees.
Mix all of the ingredients together in a bowl, I recommend using your hands. Then pile it high into your chosen pie crust, cover with your other round of dough, seal the edges, cut 3-6 leaf shaped holes near the top. And if desired brush with egg white, and sprinkle with coarse sugar.

Place the pie in the oven for 10 minutes, then decrease the oven temperature to 375 degrees and let bake for 40 minutes. This pie packs a bit of a punch from the cayenne, which I and others enjoyed. But if you do not like heat/spice I would decrease the cayenne to 1/8 tsp and the paprika to 1/4 tsp.

I found the pie a bit drier than my liking, but I am not sure how I could make it more moist. If you have any suggestions let me know! I suppose serving with ice cream would help as well, to also balance the sweet and spicy.

Friday, July 29, 2011

Plum Pie

This is the first time I baked a Plum pie, I decided to test it out since the plums were free (there was an abundance at my grandparents orchard).

Ingredients:
6-7 cups sliced plums (no need to peel)
1 1/2 cups sugar
2 tbs flour
1/4 tsp salt
3/4 tsp pumpkin pie spice
1 tsp lemon juice
1 tsp lemon zest
1 tsp vanilla extract
1 tbs tapioca

Preheat the oven to 375 and bake for 40-50 minutes.
Mix all of the ingredients together in a bowl and pour into your pie crust, I recommend using a lattice crust, brushing with egg white, and sprinkling with coarse sugar. 
The pie was very liquidy when baking so I suggest adding more flour or tapioca, it wasn't runny though when I served it the next day. It is also helpful to place the pie on a baking sheet, so any run off does not drop into your oven and set off the smoke alarm! This pie is a little tart, but some commented that they liked the tartness.

Saturday, July 23, 2011

Crispy Stuffed Zucchini Flowers

I never knew that zucchini flowers were an edible and worthy ingredient for cooking, until recently when I saw two chefs on television cooking with them.
If you are unfamiliar with a zucchini flower, this is what I am talking about:
It grows on the end of a small zucchini and gets tossed aside in the garden, but for this dish the zucchini flower takes its much deserved place in the spotlight!

 This recipe was taken and modified from Jamie Oliver's own recipe:
7 ounces of ricotta cheese
A pinch of ground nutmeg
A small handful of parmesan cheese
The zest of one lemon
1 green chile (halved, seeded, and finely chopped)
Salt and Pepper

1 3/4 cups flour
1 1/2 cups white wine or sparkling water
8 zucchini flowers
Vegetable oil

Directions:
Prep your zucchini flowers by removing the stamen from the middle of the blossom, watch out for bugs (I found one in mine)! Lightly rinse them with water, dry them off, and set them aside.
Now for the filling,
Mix together the ricotta cheese, lemon zest, nutmeg, chopped chile, parmesan, and add some salt and pepper to taste.
Next is the batter:
Whisk together the flour, wine or sparkling water, and a pinch of salt until the batter is smooth. You should be able to dip your finger in the batter and it will coat it nicely, add more flour if its too runny or more liquid if its too thick.
Stuffing the Flowers:
Fill a plastic bag with the filling and snip the end to create a piping bag, squeeze the mixture into each of the flowers until they are full, then carefully press the flowers back together to seal the mixture inside.

Now for the dangerous part!
Frying: I got hit with a few bits of oil, so be careful! (I recommend using the pots lid to fend off any violent oil)
Have tongs ready, and a plate double lined with paper towels. Pour the oil into a fryer or large sauce pan (I only filled a sauce pan about a inch and a half deep with the oil). Turn on the heat to medium-high or high and let the oil it heat up. Coat your flowers in the batter and place them in the hot oil, make sure not to place too many in at once or else they will stick. Turn them over with your tongs when the sides begin to turn golden brown and once all the sides are golden, move the flowers onto your paper towel lined plate.

They are now ready to serve! You can modify this recipe in any way you would like by using a different filling or creating a nice sauce to serve alongside, Bon Appetit! 

Friday, June 24, 2011

Bee & Thistle Guest House

If you ever plan a visit to Vancouver, B.C., consider staying at the Bee & Thistle B&B!
Your hosts Lynn & Michael, are two of the most warm and welcoming people you will ever have the pleasure to meet. Lynn is a culinary artist, creating delicious food along with a visually stunning presentation.
Mango Lassi, fresh baked almond croissants with home made strawberry/coconut/rum liqueur jam. Fresh strawberries in hand made lace toffee cups.  And...
Lemon waffles with strawberry rhubarb sauce and whipped cream & maple syrup (yes, this was all one breakfast & guests are offered baggies in order to enjoy baked goods at their leisure)                      

Creme brulee french toast w/fresh banana slices, whipped cream & maple syrup. Potato Petals w/sour cream & chives. On this morning we also enjoyed, honeydew melon ribbons w/fresh blueberries&lime/honey drizzle, along with fresh baked feta scallion scones w/chive butter.

Each room also has a small fridge with snacks provided, fresh baked cookies in your room daily and a cookie jar in the dinning room. There are few guest houses where you will be both pampered and yet feel so at home!

Monday, June 20, 2011

Victoria, BC

Recently we went on a trip to British Columbia and our first stop was Victoria off of the main land. This was the most successful vacation in terms of cuisine; we had some of the most wonderful meals.

There was one restaurant in Victoria we ate at twice in our mere 2 day stay it is called Rebar Modern Food. They have a menu of vegan, vegetarian, and fish dishes that all sound enticing. Our first meal consisted of a yam quesadilla (which was very good and had a homemade sour cream dipping sauce which was surprisingly nice), a salmon sandwich, and a slice of strawberry rhubarb pie (not as good as mine, but still delicious).

On our second visit Sierra took a chance and opted for their Reuben sandwich (made with tempeh, coarse mustard, shredded beets, relish, and swiss cheese on rye bread).

It was an incredible combination of flavors and the tempeh was cooked well (generally I do not enjoy tempeh dishes, but this one comes highly recommended).

Penny again had a salmon dish seasoned and sauteed to perfection, with brown rice, and steamed vegetables.

On our first morning we went to Lady Marmalade for breakfast. We ordered a sweet dish and a savory dish to share and they were both delicious.

The sweet dish was a rhubarb and custard crepe served with fresh whipped cream and a beautiful array of fresh fruit. The crepe was a balance of sweet from the custard and tart from the rhubarb with a hint of cinnamon.

The savory dish was a fresh tomato and pesto eggs benny with a fresh fruit sculpture and a surprising Asian inspired salad. The eggs were cooked to perfection, with a firm white outer and golden yolky inner. And the pesto sauce complemented the dish beautifully.


The second morning we went to Mo:Le another popular breakfast spot with a warm atmosphere.

Penny ordered a flavorful cranberry infused oatmeal (who knew oatmeal could be so good) with a fresh fruit sculpture (they really know how to present the fruit up here)

Sierra had the Mo:Le Benny (which had Avocado and Thyme Roasted Tomato on a Buttermilk Biscuit with Smoky Paprika Cream Sauce, Served with Pesto Hash Browns). The eggs were again poached well and the biscuit was beyond expectations, and the sauce complemented the dish very well.

Our trip to Victoria was a feast of unique flavors which we will remember and crave for years to come!

Wednesday, May 18, 2011

Crispy Tofu with Red Curry Sauce

This tofu recipe is cooked in the same way as the previous crispy tofu recipe; this one uses some different ingredients and is a smaller serving size. The sauce idea came from searching our barren kitchen for ingredients (It is barren purposefully since we are going to British Columbia for a week).

Ingredients:
6 oz of extra firm tofu
2 tbs brown rice flour
2 tbs quinoa flour
1 tbs flaxseed meal
1 1/2 tsp paprika
1/8 tsp red pepper (cayenne)

Pour enough oil into a large skillet to cover the bottom of the pan with a thin layer, and place on medium heat.
 Once the oil is heated place the tofu strips in the skillet, allow to cook for about 3 min on both sides until golden brown and transfer to a plate lined with paper towels to drain.

Sauce:
1/2 tsp toasted sesame oil
1 tsp raw coconut aminos sauce
1 tbs red curry paste
2 tbs water
1/3 cup agave nectar

Add all ingredients to a sauce pan and simmer on low heat until all the flavors combine and the sauce is hot. Serve alongside the tofu.

This dish has more Asian flavors than we tend to experiment with, so it was enjoyable to attempt to make a delicious sauce with foreign flavors; the sauce is a great balance between sweet and spicy. It can taste sweeter at first, but then comes the punch of spice!

Saturday, May 14, 2011

Food Trucks: Los Angeles

Today we stopped by the Food Truck Festival in Santa Anita, which featured many Los Angeles food trucks. Neither of us have encountered a food truck to eat from in LA so this was a first time for the both of us.

First we went to the back of a long line for the Grilled Cheese Truck since we had seen it on an episode of Eat Street on the Cooking Channel. The wait was over an hour so as we waited we ate a deep fried banana pastry which was delish, an iced coffee, and Chana Masala from an Indian Food Truck (Spicy but not flavorful).
The Lovely Line: 

From the Grilled Cheese Truck we ordered the Brie Melt (double cream brie, fig paste, and smokehouse almonds, on black peppercorn potato bread & we added sliced apples). It was pretty good; gooey cheese, balanced flavors, and toasty bread- maybe not over an hours wait good, but I didn't mind.

The most wonderful experience came after the Grilled Cheese. We went to get ice cream sandwiches from Coolhaus since we read an article about them in a magazine. They were the most incredibly delicious ice cream sandwiches either of us have ever encountered. And we don't even like ice cream very much, we are more gelato people. But their homemade ice cream and cookies cannot be beat!

On the left is a Snicker doodle cookie with Balsamic Fig and Mascarpone ice cream (it had a perfect balance between sweet and even a bit tangy, do not shy away from this strange sounding flavor!)
& on the right is a Chocolate cookie with Dirty Mint Chip Ice Cream ( a wonderful combo, the cookie was moist and the ice cream is refreshingly minty with actual bits of mint scattered throughout). 
Coolhaus also uses edible wrappers made out of potato, so there is no trash once you finish your delectable treat. And they put a heaping scoop of their ice cream between the cookies. We highly recommend tracking them down when you are in the LA area, they will also soon have a shop in Culver City! 
Attending the festival was worth it purely because of the ice cream sandwiches.

Thursday, May 5, 2011

Four Petite Pies

There are so many different types of pie filling in this world. Since I had extra butter almond crust from my last pie and have been longing to experiment with not so typical fillings this was the perfect opportunity! These flavor ideas have been mingling in my mind for a while now and by using 4 small ramekins I was able to bake a small amount of four different flavors.

Crust: Recipe on previous post (Butter Almond Crust)
Roll out the dough and use a circular object to cut round pieces of crust (I used a small bowl) and line the ramekins (you can use small glass jars or a muffin tin as well).

All of the pies cook at 375 degrees & use a squeeze of fresh lemon juice. 

Pear Ginger Pie: A spicy pie- the pear and ginger work well together, I would recommend less grated ginger than I used since it is a strong flavor.
1/2 of a pear (peeled and cut into bite sized pieces)
1/8 tsp tapioca
2 tbsp sugar
1/4 tsp grated ginger

Apple Paprika Pie: My favorite combination out of the four. I would use more paprika next time since the flavor is more subtle. With the amount I used it tastes like apple pie with something more that you can not quite pinpoint.
1/2 apple (peeled and cut into bite sized pieces)
1/8 tsp tapioca
2 tbsp sugar
1/4 tsp paprika

Beet Almond Mint Pie: For beet lovers only! I love beets and it does have a nice flavor, but I do not necessarily want to keep eating it.
2 small beets (I used precooked beets from the refrigerated section at trader joes)
1/8 tapioca
2 tbsp sugar
1/2 tsp almond extract
1 tsp minced mint

Berry Almond Rosemary Pie: Flavors combined nicely. The rosemary gives it a little something extra.
1/2 cup berries (I used a frozen mix- blackberry/blueberry/raspberry)
1/8 tsp tapioca
2 tbsp sugar
1/4 tsp almond extract
1/2 tsp chopped rosemary
 

Directions for all pies:
In a small saucepan over low heat mix together the sugar (you can use less than 2 tbsp, mine was a tad sweet), tapioca, a squeeze of fresh lemon juice, and the flavorings (herbs & extracts). Combine thoroughly, then add the fruit. Stir together so that all of the flavors have the chance to combine and the mixture begins to become liquidy.
Scoop the filling into a ramekin and pour the remaining liquid over the top.   

Topping: Since I cared more about the filling and less about the topping I did not think about it too much. I recommend using less sugar, adding flour, and butter. The pies were a little too sweet and I believe it was mainly from the topping.
1/2 cup brown sugar
1/4 cup quick-cooking oats
1/2 tsp cinnamon
1/8 tsp nutmeg
Mix all of the ingredients together in a small bowl and cover each of the pies with the mixture.
Place the ramekins on a cooking sheet and back in a 375 degree oven for 10-20 minutes. (mine took 20- I recommend setting for 10 and checking on them). The apple took a bit longer to cook than the others.
All in all I would consider this a successful attempt at unique petite pies: considering I did not use any type of recipe and I am lousy at math=amounts.

Friday, April 29, 2011

Mint Blueberry Pie with Butter Almond Crust

I (Sierra) have an obsession with making pies, I do not know were this passion came from but all I want to do is create different and unique flavored pies! I would love to buy a food cart and walk around selling pies to create an income for myself. The only problem is that I would need a license, where I live is not very walkable, and I doubt that my pies are as wonderful as they could be in the future. Maybe one day you will encounter me selling unique flavored pies on the streets of a large city. Until then I shall continue to be a "pie maker".

All Butter Crust with Almonds:
2 cups all-purpose flour (I used whole wheat pastry flour because it is what I had on hand)
1/2 cup finely ground blanched almonds or almond flour
1 cup (2 sticks) unsalted butter (cut into 1/2 inch cubes & frozen)
1 teaspoon salt
1 heaping teaspoon brown sugar
6 to 8 tablespoons ice water

Combine the flour, almond flour, salt, and sugar in a food processor; pulse to mix. Add the butter and pulse until the mixture is course with pea sized clumps of butter. Add the water 1 Tbsp at a time while pulsing the mixture until it begins to clump together and hold.
Remove the dough and gently shape into two discs. Do not over-knead the dough. There will be small pieces of butter in the dough, which creates the flaky crust. Sprinkle a little flour over the discs and wrap them in plastic wrap or in an airtight container. Refrigerate for at least 1 hour.
Remove one of the dough discs from the fridge and let sit out for 5-10 minutes to soften. Roll out the dough with a rolling pin over a lightly floured surface to a 12 inch circle about 1/8 of an inch thick. Place the dough into a 9-inch pie pan and gently press the dough to line the bottom and sides of the pan. You can trim the extra dough that will hang over the edge.

Mint Blueberry Filling:
Preheat the oven to 400 degrees.

3 pints of blueberries (I used frozen because the fresh were very expensive)- you do not have to thaw them.
1/4 cup freshly squeezed lemon
1/2 cup sugar
1 tsp ground cinnamon
1/4 tsp nutmeg 
3 tsp minced mint or peppermint
1 tsp instant tapioca
1/2 cup flour

Place 1 pint of blueberries in a large sauce pan along with the lemon juice, sugar, cinnamon, nutmeg, mint, and tapioca. Place on medium heat until the mixture is a dark violet color or until the mixture bubbles. Continuously stir the mixture, then add the flour and stir for 2-3 minutes. Remove from heat and stir in the other 2 pints of blueberries. Spoon the filling into the unbaked pie shell. I decided to mince about 1/2 tsp of mint to scatter over the top of the pie once the filling was spooned in - since it was my first time making a pie with mint in it I wanted to be sure nothing would over power the minty flavor.


Remove the other disc of crust from the fridge and allow to soften for about 5 minutes, then roll out the dough. I chose to do a lattice crust since the pie contains quite a bit of liquid. To do this you cut the crust into long 1/2 inch strips. Then you place about 4 of the strips across the pie, leaving 1/2 inch spaces between each strip. Next you take a strip and weave in through the others in the other direction (over and under pattern) and you do this with about 3 more strips, then crimp the edges and you are done!
In my opinion the lattice pattern creates the most beautiful and professional looking pies and the juices from the pie will not bubble out with this technique.


Bake for about 30 minutes or until the crust begins to brown.
Allow to cool and then refrigerate.
Both the filling and the crust have a really nice flavor, the mint is a nice, light touch to the pie. Next time I will consider adding even more mint to give it a stronger flavor. I would consider this pie a success! Tres magnifique!

Tuesday, April 26, 2011

Mediterranean Pasta with Greens

If you are looking for a fresh and delicious pasta dish, this is definitely worth a try. The Mediterranean Pasta dish has been a favorite of ours from our very first try. This recipe comes from the cook book Clean Food by Terry Walters.

Ingrediants:
1 pound Penne or Fusilli
3 tablespoons Extra Virgin Olive Oil
3 Garlic cloves, minced
1 small Onion, chopped
1 tablespoon dried Basil
2 teaspoons dried Oregano
1 1/2 cups canned Chickpeas
2 cups canned diced Tomatoes with their liquid
2 tablespoons Tomato Paste
1/4 cup Mirin (sweet cooking sake)
1 small bunch Kale, chopped into bite-size pieces
Sea Salt and freshly ground Black Pepper (We like to use everyday seasoning from Trader Joes)
Chopped fresh Parsley for garnish

Directions:
Cook pasta according to directions on package. Rinse, drain, and return to the pot. Drizzle with one tablespoon olive oil and set aside.
In a large Dutch oven over medium heat, saute garlic and onion in 2 tablespoons olive oil until soft (about 3 min). Add basil, oregano, chickpeas, tomatoes, tomato paste, and mirin. Saute for 5 minutes longer. Add the kale, then cover and cook for 3 minutes or until soft. Uncover and stir to combine all ingredients. Season with salt and pepper and toss with the pasta. Cook to heat through, then garnish with parsley.

The dish is so fresh tasting, flavorful, and still light. It is a great alternative to your everyday pasta with red sauce and it provides greater health benefits as well!

Sunday, April 24, 2011

Ricotta Pancakes

This is another recipe from the cooking channels Extra Virgin and our first time testing this recipe out. They are a very light and fluffy pancake, with a unique light flavor from the ricotta. These would taste wonderful with blueberries mixed into the batter, orange zest, or almond extract.

Ingredients:
1/2 cup all-purpose Flour
1 tablespoon Sugar
Pinch of Kosher Salt
Zest of 1/2 Lemon
1 1/2 cups Ricotta Cheese
4 Eggs, Separated
Butter or cooking spray for the griddle

Heat a nonstick griddle to medium-high heat.
Mix together the flour, sugar, salt, lemon zest, ricotta, and yolks in a large bowl until thoroughly combined.
Beat the egg whites with an electric hand mixer in a separate bowl until stiff. Fold the egg whites into the ricotta mixture.
Spread some butter on the hot pancake griddle (or cooking spray).
Ladle 1/4-1/2 cup size pancakes onto the hot griddle and cook for about 2- 2 1/2 minutes per side, until golden.


You can keep the pancakes warm in a 200 degree oven/toaster oven before serving.

In place of syrup we heated up frozen fruit (we used raspberry-blueberry-blackberry mix) in a sauce pan and added sugar (or any sweetener you prefer) to taste.

"Fabulous fluffy deliciousness" - Penny       Bon Appetit!

Saturday, April 23, 2011

Banana Cream Pie with Hazelnut Crust

This recipe is compiled of three different recipes found online. This is a no-cook banana cream pie with a layer of chocolate, hazelnut crust, and a coconut cream topping (instead of whipped cream). Neither of us has ever made a banana cream pie, but it sounded good so we thought we would give it a try. While also making it one of a kind!
Now this pie was not made without any faults, we mistakenly used coconut milk with the pudding mix in the filling and then realized that the microscopic font on the base of the box said to use only real milk. So the consistency ended up being runnier and we had to store it in the freezer before serving.

Note that for the coconut cream topping the canned coconut must sit in the fridge for at least 4 hours!

Hazelnut Crust:
1 1/2 cup Whole Hazelnuts
4 Tbsp Butter (melted)
3 Tbsp Sugar

Directions:
Toast the hazelnuts in the oven for 10 minutes at 350 degrees. Cool slightly then rub the skins off with your fingers or a towel. Place the nuts in a food processor and pulse until coarsely chopped. Add the sugar and process until the nuts are finely chopped, but not greasy. Then combine the nut mixture with the melted butter and pat into the bottom of a 9" pie pan.
Bake at 350 degrees for 10 minutes. Allow to cool.

Now for the layer of chocolate:
2 (1 oz) squares of semisweet chocolate (we ended up using dark chocolate squares)
1 Tbsp Milk (we used coconut milk)
1 oz of Butter

Directions:
Fill the bottom of a sauce pan with water and place a glass bowl over it making sure that the bowl does not touch the water. Place on low heat and add the chocolate squares and the milk. Allow to partially melt and then add the butter. Make sure to continuously stir, once melted remove from the heat and continue to stir as it cools slightly. Then pour over the hazelnut crust and spread the chocolate evenly along the bottom and the sides.
This is the pie once we added the layer of bananas:

 Filling:
2 Bananas, sliced
1 1/2 cups cold Milk (Do not use coconut milk instead-we made this mistake)
1 (3.5 oz) package of Instant Vanilla Pudding

Directions:
Arrange the banana slices over the chocolate. Pour 1 1/2 cups milk into a large bowl. Add the pudding mix and beat with a whisk for 2 minutes. (the instant pudding we bought also wanted us to let it sit for 5 min and then whisk once again). Spoon over the banana slices and spread evenly.

Vegan Coconut Cream:
1 1/2 cups Full Fat Coconut Milk
1/3 cup Powdered Sugar (or to taste)
1-4 Tbsp Coconut Flour (or tapioca flour) Add 1 Tbsp at a time.(we ended up using only 2 Tbsp)
1 Tbsp Vanilla Extract to taste 

Directions:
Open the cans of coconut milk and transfer to a glass or metal bowl. Cover with a lid or plastic wrap and refrigerate at least 4 hours, or overnight.
Beat the thick coconut cream in the chilled bowl with a hand mixer until thick and fluffy. Gradually beat in the powdered sugar and coconut (or tapioca) flour, 1 or 2 Tbsp at a time testing for flavor and consistency. Use a rubber spatula to transfer onto the top of the banana cream pie.
We topped the pie with toasted flaked coconut (350 degrees for about 5 minutes).

The flavor of this pie turned out perfectly! Everyone enjoyed it even though the consistency was not up to par. The hazelnut crust adds a nice contrast to the sweeter pudding filling and the pudding begins to take on the banana flavor really well. And the coconut cream topping was a nice substitute for the typical sweet whipped topping. Overall this is a pie that we will make and share again!

Friday, April 15, 2011

Spinach and Ricotta Gnocchi


We got this recipe from Gabriele Corcos and Debi Mazar's show "Extra Virgin" on the cooking channel. It is a simple and delicous Gnocchi recipe, which could be considered healthier than your average Gnocchi because it there is no potato or flour and instead a lot of spinach!

Ingrediants:
  • 2 pounds fresh spinach (about 3 bunches)
  • 1 (16-ounce) container ricotta cheese
  • 6 tablespoons freshly grated Parmesan, plus more for serving
  • 2 egg yolks, lightly beaten
  • 4 tablespoons unsalted butter, plus more for the dish
  • Kosher salt and freshly ground black pepper
  • 2 handfuls fresh sage
Directions:
Preheat the oven to 350 degrees F.

Bring a large pot salted water to a boil.

Cut the stems off the spinach, and soak the leaves in the sink. Wash them thoroughly.

Add the spinach to the boiling water and cook 1 minute. Remove spinach from the water and plunge in a large bowl of ice water to stop the cooking.

Drain the spinach very well, and using a clean tea towel, squeeze out the extra water. Chop the leaves very fine.

Put the cooked spinach in a large bowl, add the ricotta, 3 tablespoons Parmesan, egg yolks, and season with a couple pinches salt and some freshly ground black pepper. Mix well, and make sure that the ricotta crumbles into fine pieces, and mixes properly with the spinach. Shape the mixture into balls about the size of walnuts.

Lightly butter a 13 by 9-inch casserole dish, lay all the gnocchi in it, and dress it with a few very thin slices butter and a sprinkling of Parmesan. Cook the gnocchi at 350 degrees F for about 20 minutes, and then use the broiler for the last 5 minutes to crisp and brown the top of the spinach balls.

In a medium skillet, melt the remaining 1 1/2 tablespoons butter (we added 1-2 tbl spoons olive oil/ which made more sauce), and saute the sage until it starts to brown. Serve the gnocchi on a warm plate and dress with the sage-butter sauce, and garnish with freshly grated Parmesan.
Not the most flattering picture, but they do taste wonderful!